Cyclops Caving
by Eli
This is an archive of a post from my previous website. I am reposting it here for posterity.
So it’s been over two years since my last post. Suffice to say that I have not been doing a lot of photography the past couple years, and what little I have done, I have not gotten around to posting. I did however, take a photo trip into Cyclops earlier this year.
Cyclops is a wild cave in Southwest Virginia that a group of us cavers have been exploring and surveying for several years now. The cave contains well over 4 miles of surveyed passage, with a vertical extent of over 250 feet. Trips into the cave tend to be long, often lasting 12-15 hours. The entrance to the cave is tight and difficult, requiring full vertical gear and a lot of effort to get into and out of. For a caver in good shape, just getting into the main section of the cave requires close to an hour of crawling, squeezing, and rappelling, including eight different drops between 20 and 40 feet in mud like cookie dough. Getting out of the cave easily takes twice as long because you’re already tired, it’s all up hill, and climbing muddy ropes sucks.
At this point I should pause and mention a couple things about cave photography. One challenge is that, other than the very entrance, there is no light in a cave. I’m not talking low light, or even like night time, I’m talking NO LIGHT! Any light that enters the camera to create an image is going to come from your light-sources. Some people prefer strobes, other people use bright lights over a longer exposure, while others use some combination there of. The difficulty is further compounded by the dark browns and grays found in caves that tend to absorb most of the light you shine at them. Whatever light-sources you chose, in large passages, it’s going to take a lot of light to fully illuminate the room. This usually means a lot of strobes or lights, and a lot of batteries to power them.
I should also mention that caves tend to be very hard on gear. They are muddy, wet, dusty, humid, and full of hard, often sharp rocks. Traveling through caves often requires climbing, crawling, squeezing through tight spots, and sloshing through water and mud. All the gear we take into the cave must be able to withstand the abuse we put it through, and even then, it tends to wear out quicker than we would like. Camera gear is simply not made to stand up to a cave environment, so we need something to put the camera in that can take the abuse while keeping the camera safe… Enter the Otter/Pelican Box! Unfortunately, these durable waterproof boxes are fairly bulky, making them less than fun to haul through constricted passages. With all this in mind, it’s little wonder that lugging camera gear into and out of the entrance series is usually pretty low on the priority list unless it’s a dedicated photo trip.
Well, earlier this year there was a request to get some photos of the lower sections of the cave that had never been photographed before. I volunteered, found two suckers courageous gentlemen to help me lug all the strobes and batteries, and we set a date of March 3rd.
Zeb and I arrived the night before to find the ground fully saturated and the rain still pouring. Zeb’s truck got stuck in the mud, but we were fortunate enough to not get blown away by one of the many tornadoes that caused so much devastation that night.
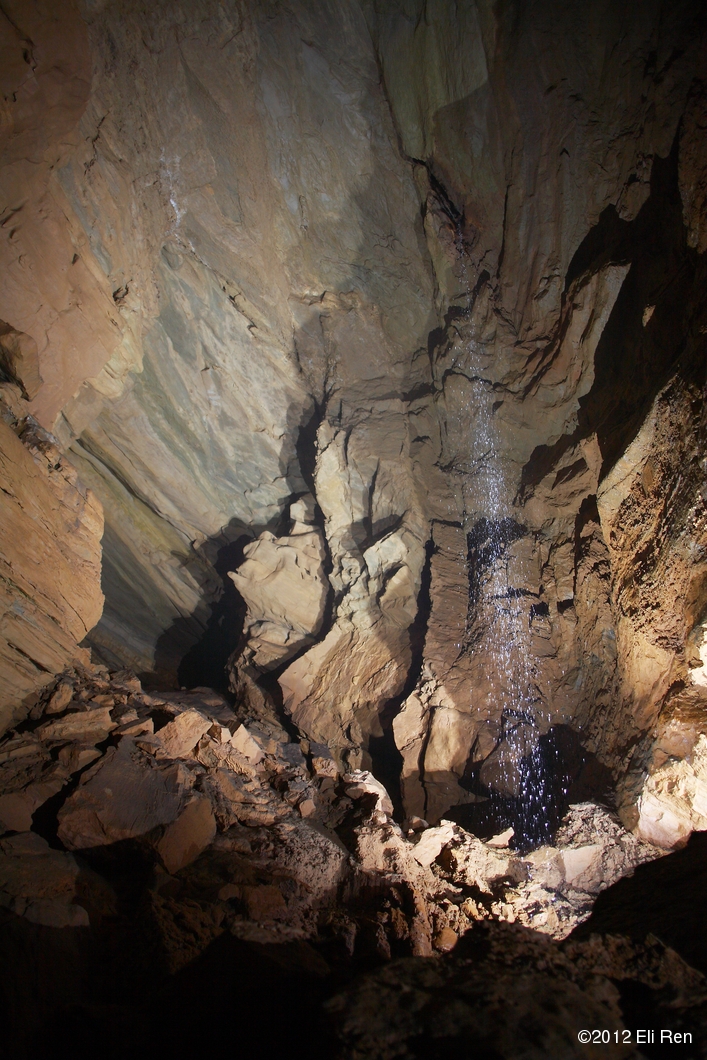
The next morning, we met up with Aaron, got gear sorted, and after getting Zeb’s truck un-stuck (thanks Wes), we finally got into the cave about lunch time. We made good time getting into the cave and were into the main passage in just about an hour. After taking some time to rest and have a snack, we got about the business of taking some pictures. For the first shot, we photographed the fountain – a fast drip/waterfall in the middle of a 40′ tall dome that is creating some nice stalagmites. I used three powerful strobes for this shot – two to the right of the camera, and one directly under the fountain in a large waterproof bag.
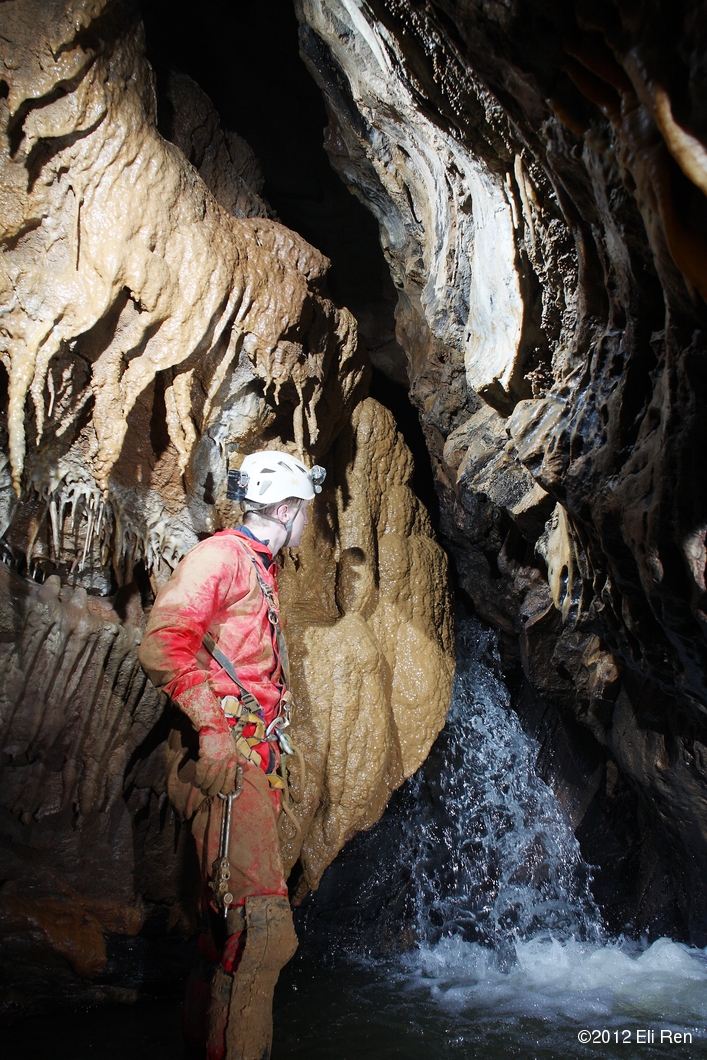
Once I was satisfied with the first shot, we headed down into a side passage to get some shots of a small waterfall, which, after so much rain over night, was flowing pretty well. This shot included one strobe to the lower right of the camera, and one strobe on a human light-stand (Zeb) to the upper left.
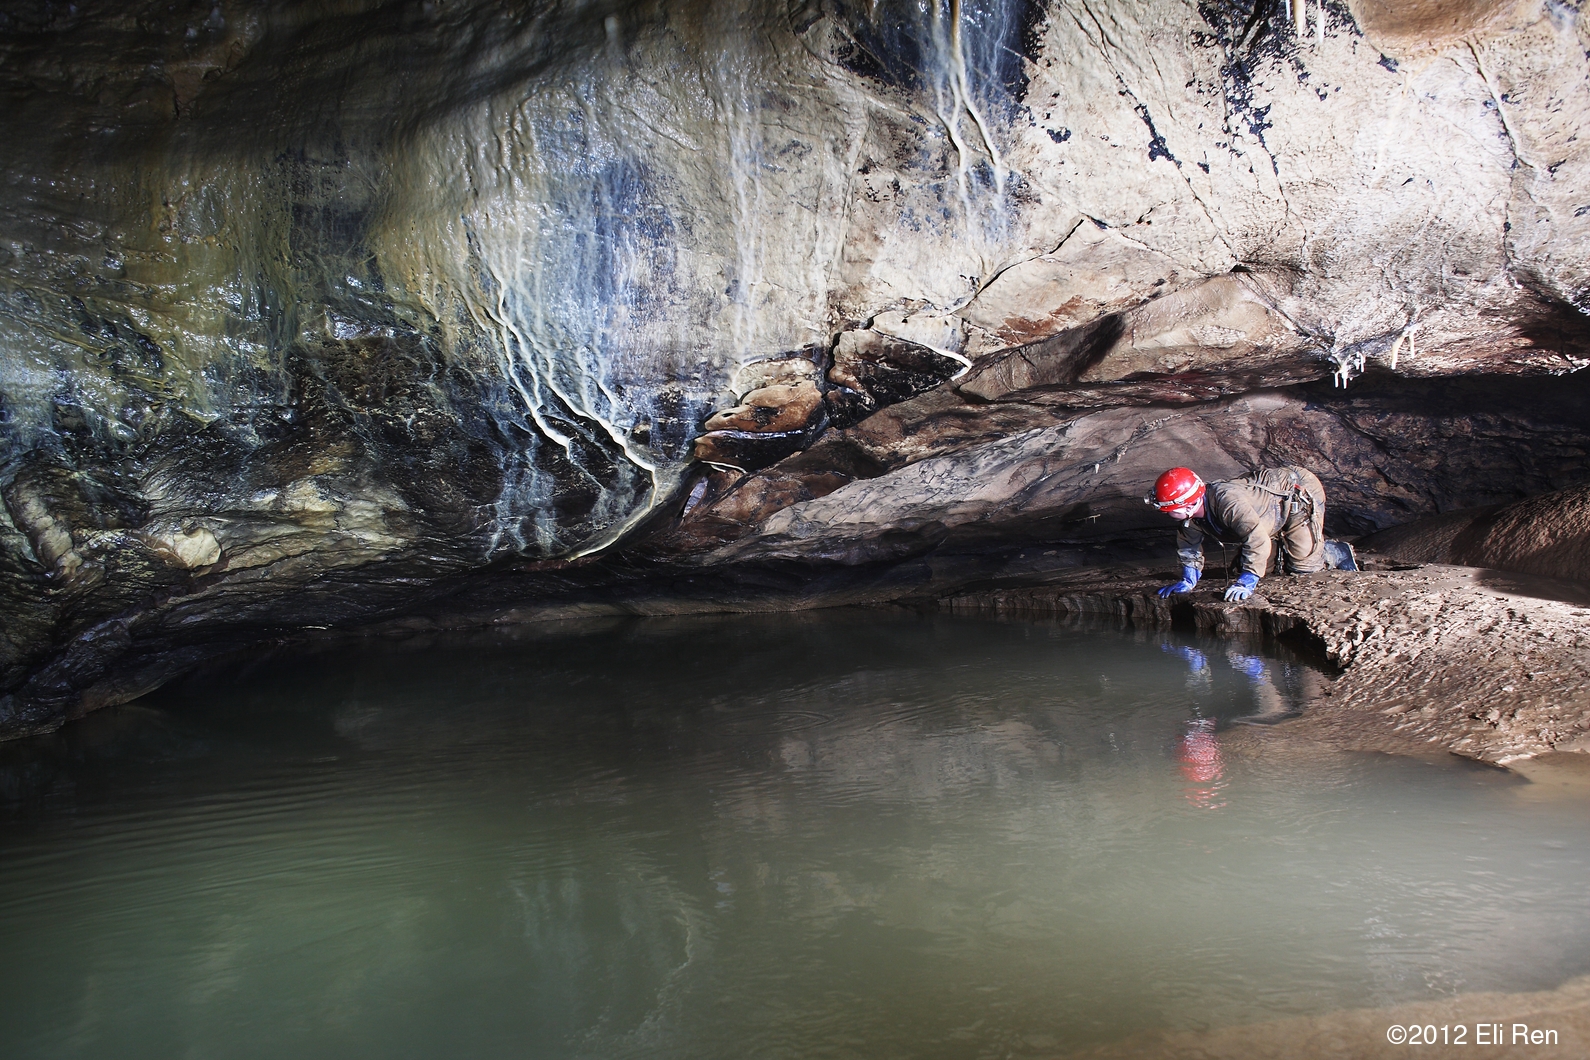
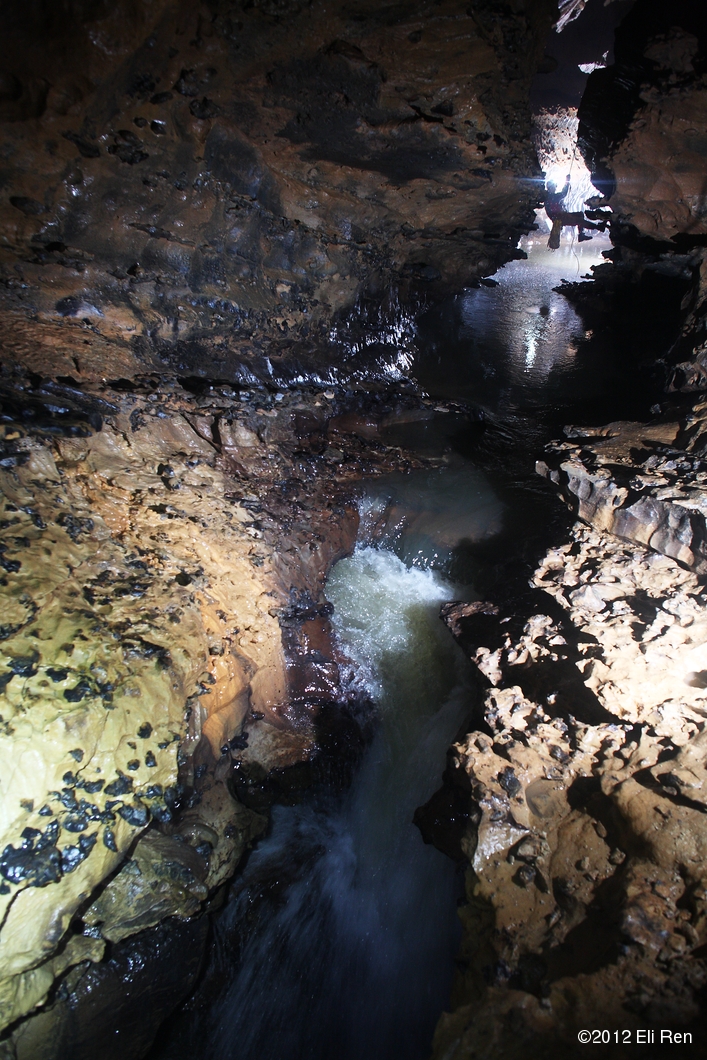
We then turned around and got another shot in the low passage down stream of the waterfall. This was shot with one strobe further down the passage, pointing back upstream, and another strobe above and to the left of the camera.

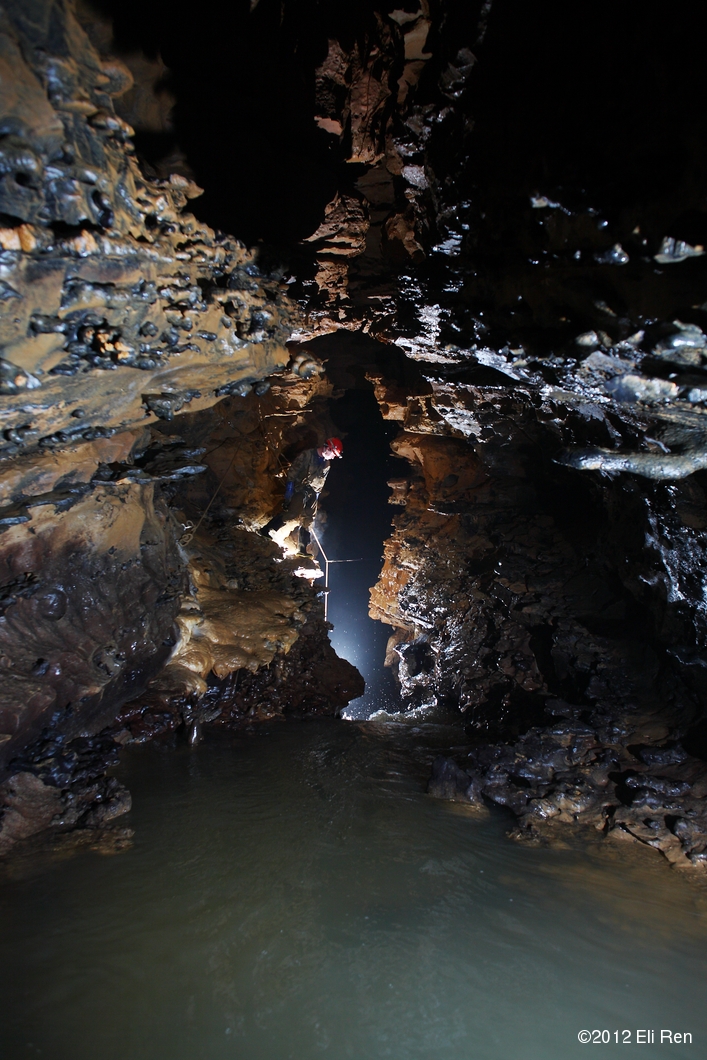
After that, we packed up the photo gear and headed for the “Rapture River.” We climbed up to “Prometheus Junction,” took a left, headed down through some enormous bore-hole and took another left into a crawling passage. After about 100m of crawling and climbing through some tight passages and canyons, we started to hear the roar of the “Rapture River” We came out to the edge, clipped into the safety line and rigged in for our 30-40′ rappel into the canyon. Once we reached the bottom, we found a stream passage that was well above normal flow… like 20x what it had been last time I was there. After clipping into the safety line for a quick peek over the lip of the waterfall, we determined that rappelling off the next drop would be a great way to get hypothermia and die, so we decided to head upstream to capture what we could. We got to the upstream sump and got a picture there. For this photo, I used two strobes to the right of the camera, one strobe underneath the camera, and some light painting with my homemade 2000 Lumen headlamp to fill in the dark spots.
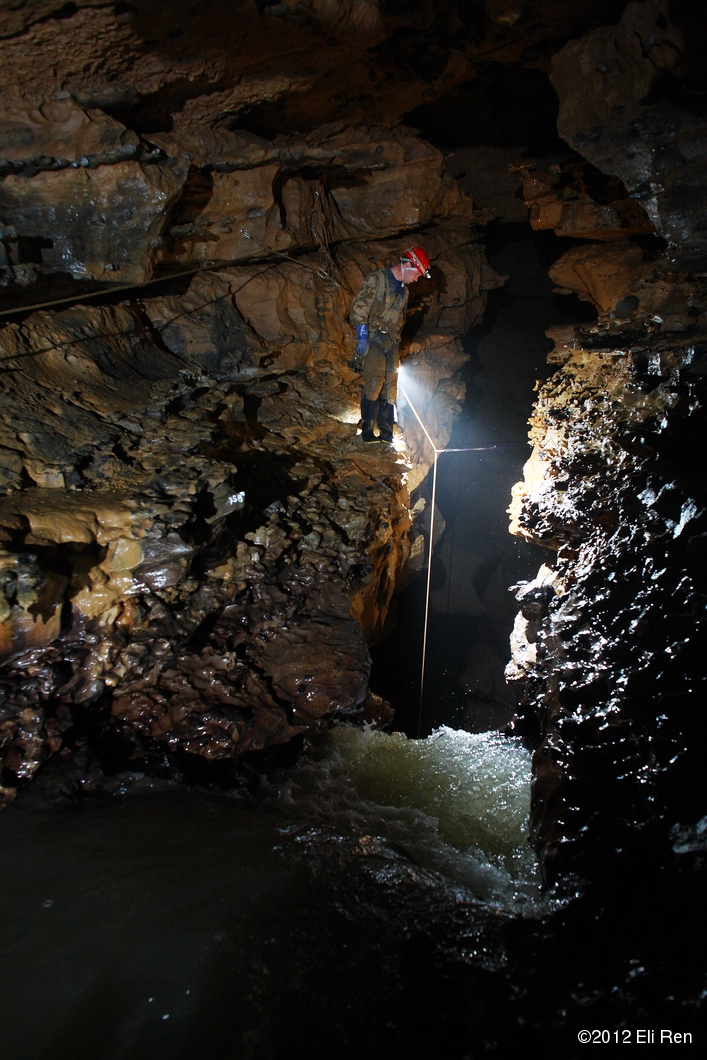
We then turned around and shot behind us looking down the canyon. I took this shot using one strobe on top of the rock next to Zeb, one down the passage pointing back upstream, one under the camera, one on a human light-stand (Aaron) to the left of the camera, and my headlamp to fill in a couple shadows.
We then headed downstream to capture a nice drip formation. This was shot with a strobe on a human light-stand (Zeb) down the passage pointing back upstream, two strobe to the left of the camera pointing up and down, and some light painting for the shadows.

We then got a couple shots from the lip of the waterfall, pointing back upstream with Aaron dangling on rope. For this shot I used two strobes up the passage pointing back downstream, one on a ledge to the right of the camera, one in my left hand above and to the left of the camera, and using my headlamp for some fill. All this while dangling off the edge of the drop with a camera in one hand and a strobe in the other. It was a tricky shot, but a fast shutter speed and having plenty of strobes made it work.
The next two shots are pointing downstream at the drop. Aaron is on rope just out of frame, pointing a strobe (in a waterproof bag) back up at the lip. Zeb is holding another strobe, pointed back down the drop, and there are strobes to either side of the camera. Again, the camera is handheld with a fast shutter speed.
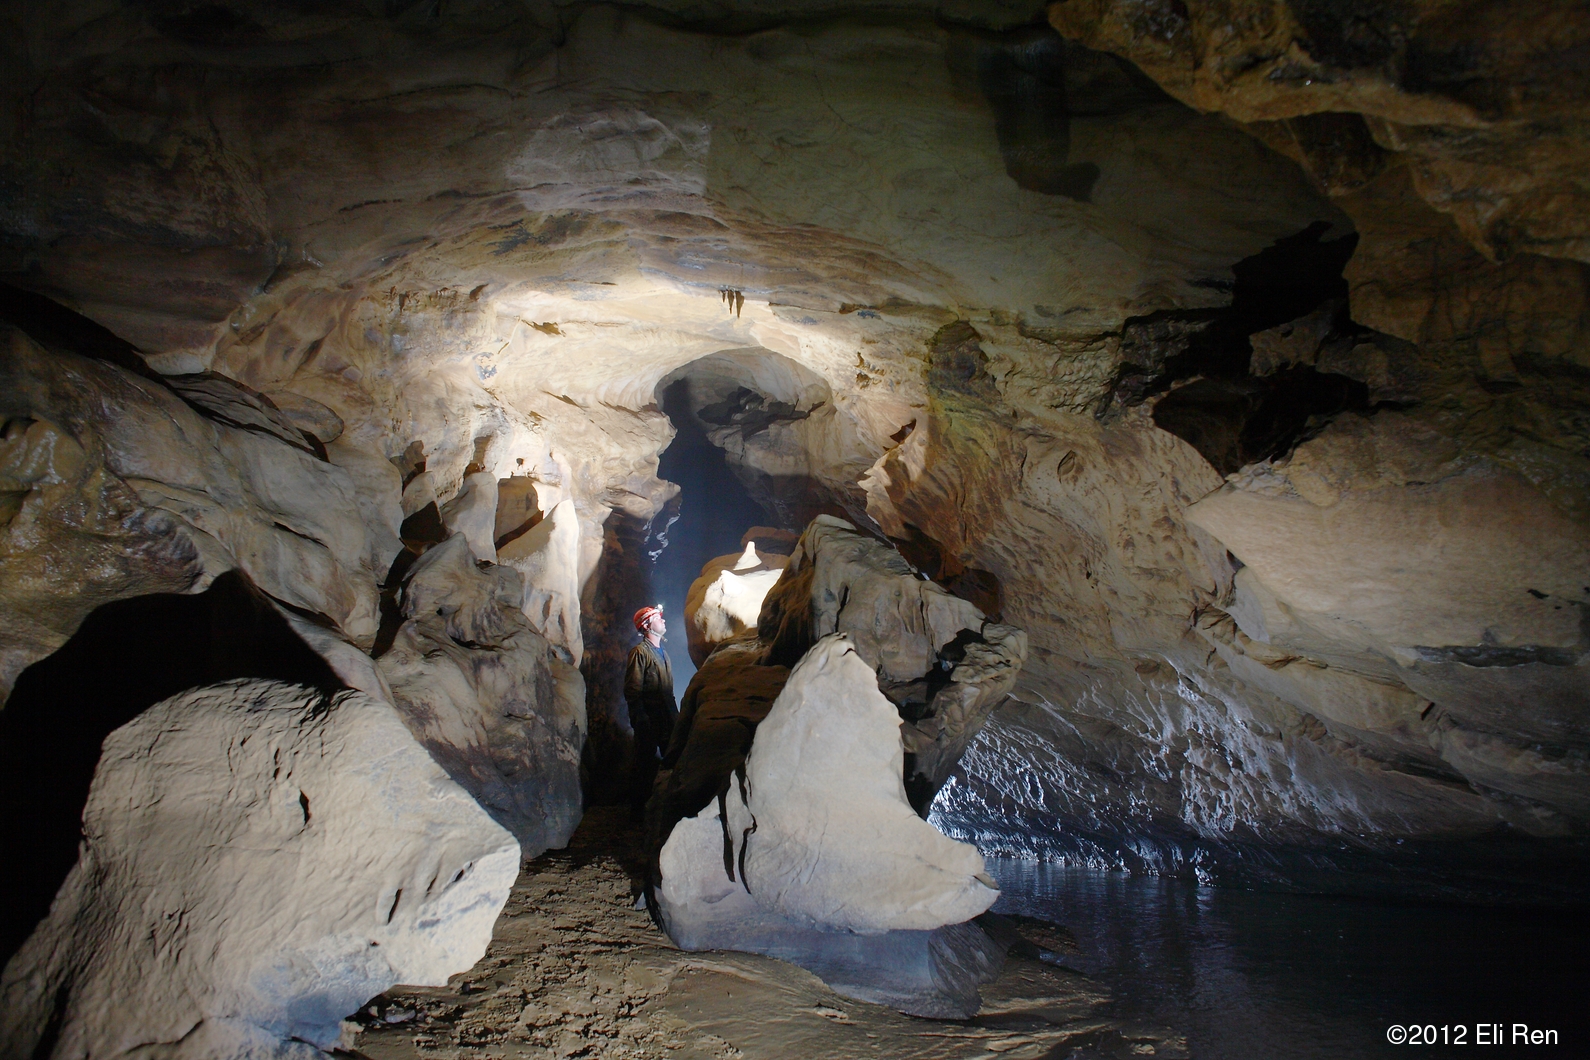
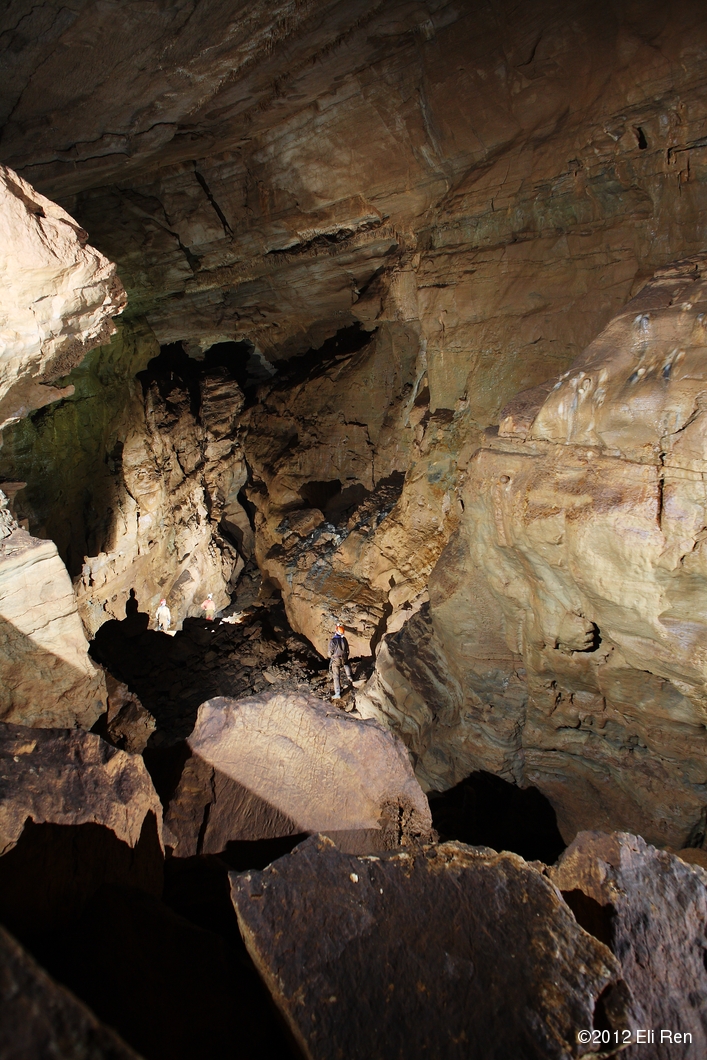
Having captured about as much of the “Rapture River” as we could considering the water level, we packed up the camera gear and started climbing out of the canyon. We made our way back to the borehole and decided to use all the strobes to light up the world for one last shot before we headed to the surface. This shot used all six strobes that we brought, as well as all of our headlamps. I used a radio shutter release so we could all get in the picture. I’ll let you figure out where all the strobes are in the picture.
Once we finally got tired of climbing all over the passage to adjust the strobes, we called it good and packed up the photo gear. We started our muddy journey back to the surface, and within a couple hours, we were all safely back at the cars and changing into clean clothes.
Thanks to Zeb and Aaron for all their help. You guys rock!
P.S. Click here to snipe your used gear on flea-bay: Auction Sniper
Subscribe via RSS